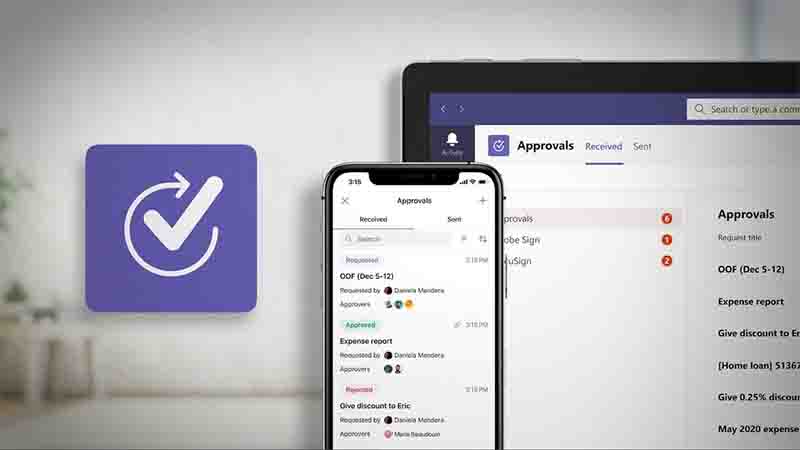
Approvals in Microsoft Teams are a way to make all of your requests and processes with your team or partners more effective. You'll be able to create new approvals, display those that have been sent to you, and keep track of all of your previous approvals in one place.
Create an approval request
In Microsoft Teams, you can easily launch an approval flow from a chat or a channel conversation. You can also use the Approvals app to generate an approval. Simply enter the request's name, who needs to authorize it, any additional details, and, if necessary, an attachment. You may also generate custom answers to adapt your request to your company's requirements.
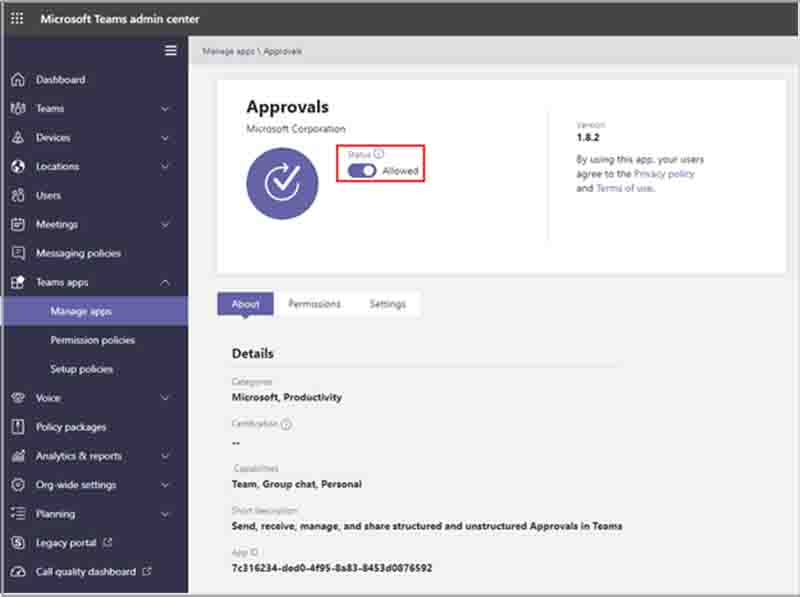
All, from frontline staff to corporate headquarters employees, can easily develop, manage, and share approvals directly from your Microsoft Teams hub for teamwork.
The approvers are informed until an acceptance is submitted. They will easily review the request's specifics as well as any files attached to the approval. If you submitted the request in a chat or a channel, you'll see an approvals card with all the actions you can take.
The Approvals app in Teams allows you to view and control all of your approvals in one location. Each request is listed with important information such as the status, source, requestor, and approvers. You may also choose a separate approval to see additional details and monitor its progress.
- Approvals hub - This is where you'll find all of your permissions, including those that are already full, that you've submitted or got. Approvals appear in Power Automate, SharePoint, and Microsoft Dynamics 365, among other places.
- Approvals from chat – It's simple to give an acceptance from inside a Teams conversation. Set it up from the compose box, then check your chat for the approvals card. Only people who are already participating in the discussion may be added as approvers.
- Approvals card - The card shows the status of the approval in real time. Check to see who has replied and who needs a little more time.
- Basic approval - When you start from the hub or a chat, you'll usually use a simple approval. All approvals are saved in the Common Data Service, where only those who are on the approval list and a tenant admin have access.
- Workflow approval - When you build a Power Automate approval, it will appear in your app's list of approvals. You may create a new flow and pick a trigger, such as a system-driven event from one of the 350+ connectors given, or your own LOB connector, making this a workflow approval.
- Notifications - Inside Teams, go to the Notifications tab to customize the notification settings.
- Endless options - Using Approvals to get something done inside Teams, whether you need to file an expense report, offer a customer a discount, or request time off.